Thank you to everyone who stopped by my blog this month and left wonderful comments. I have enjoyed reading all of them.
Random.org chose day 13 - Penguins to choose the winner from. Out of the comments left that day number 1 was chosen by Random.org as the winner. This means that
LISAM
you are the lucky winner!! Congratulations Lisa!!
Please contact me by Thursday with your address. You can PM me on the My Scraps and More boards.
Tuesday, December 27, 2011
Sunday, December 25, 2011
25 Days of Christmas - Last Day to Enter to win the Gingerbread Cart
Merry Christmas to each and everyone of you. I hope you all are having a fabulous Christmas and spending some quality time with the ones you love.
I would like to take a moment to thank Erica for having me as part of her seasonal design team. I had a great time creating all of my projects for the 25 Days of Christmas.
I was going to share with you all a couple of gifts that I made my brother and his girlfriend but I completely forgot to take pictures before wrapping them up. Instead I'll leave you with one last
MERRY CHRISTMAS
and I'll see you back here Tuesday when I announce the winner of the Gingerbread Cricut cartridge. To enter to win simply become a follower and leave me a comment on this and every other 25 Days of Christmas post. I will use Random.org to first select the day that the winner will be chosen from. I will then select the winner from all comments from followers left on that day. Good luck.
Saturday, December 24, 2011
25 Days of Christmas - Santa

Welcome to Erica's Craft Room
25 Days of Christmas,
with 25 Cricut projects a day.
Don't forget to stop by Erica's blog to see 24 more projects today....
and every day in December.
I made a Santa key to share with you today.
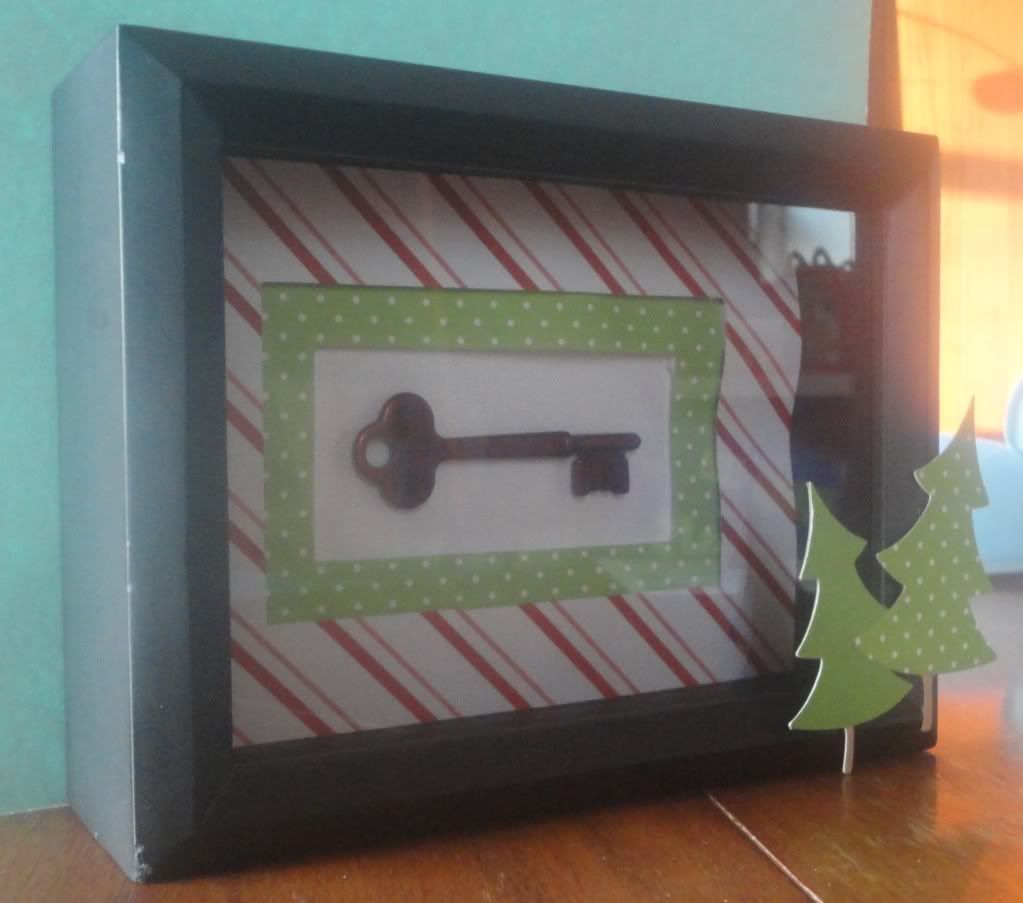
I started with a shadowbox and a white Bazzill Bling mat. I used foam tape to mount the green frame that is 1 1/2" wide. Then I used foam tape again to mount the striped frame which is 1" wide.
I colored the Tim Holtz key using watermelon alcohol ink. All I had to do was drop the ink directly on the metal. It took about 24 hours for the ink to fully dry. I used Pop Dots to mount the key to the white mat.
The trees are cut from Winter Frolic at 4".
I told my daughter that this is a special key, that only Santa can get out of the box, and use to get inside our house. She cannot wait for him to come to our house tonight!
Friday, December 23, 2011
25 Days of Christmas - Snowman
Welcome to Erica's Craft Room
25 Days of Christmas,
with 25 Cricut projects a day.
Don't forget to stop by Erica's blog to see 24 more projects today....
and every day in December.
For today's project I have a framed 3D snowman for you.
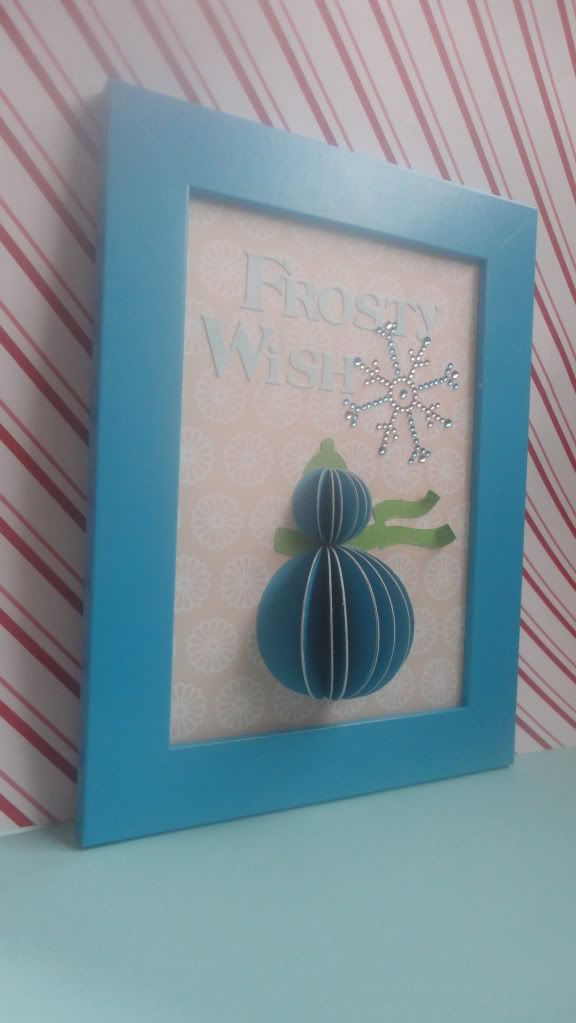
I used my Martha Stewart Scoreboard (LOVE this thing) to score down the middle of each circle. I then used a glue stick to adhere half of each circle to another half. I used my ATG to glue the completed sphere to the patterned paper.
The hat a scarf are cut from Winter Frolic at 3" and glued under the snowman. I used a stylus to curl the ends of the scarf.

Make sure to become a follower and leave a comment on this and all of my other 25 Days of Christmas posts to be eligible to win my blog candy - the Gingerbread Cricut Cartridge! You can find all the details here (scroll all the way down).
Thursday, December 22, 2011
25 Days of Christmas - Gingerbread
Welcome to Erica's Craft Room
25 Days of Christmas,
with 25 Cricut projects a day.
Don't forget to stop by Erica's blog to see 24 more projects today....
and every day in December.
I made a sweet little gingerbread card to share with you today. He's very easy to make and looks so yummy.
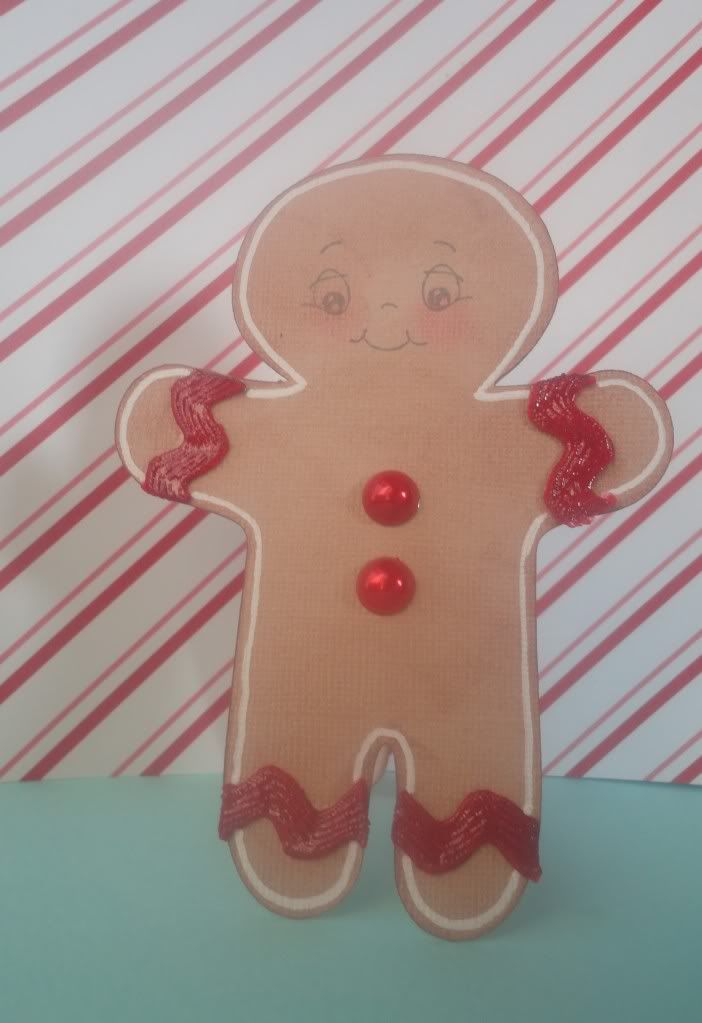
I used the shadow of the gingerbread man found on page 61 of the Winter Frolic Cricut cartridge. I cut him out at 5" on both white cardstock and a textured light brown card.
To make my card look more like a real cookie I sponged on brown chalk ink. My little guys face is Peachy Keen Stamps wide eyed kids 1 1/8". To give him some rosey cheeks I used Inkadinkado blending chalks. His wavy icing bands are rik-rac ribbon with glossy accents. I used my Recollections opaque pen to drawn the white frosting line around him and his buttons are Bo Bunny Blitzen jewels.

Since I don't have a gypsy to weld a card together I scored my white gingerbread layer near the top, applied a line of glue and adhered the two layers together. I also inked the white layer with brown chalk ink. The sentiment is from the Inkadinkado Pattern Play Holiday stamp set and is stamped in Recollections ruby ink.
Wednesday, December 21, 2011
25 Days of Christmas - Kids
Welcome to Erica's Craft Room
25 Days of Christmas,
with 25 Cricut projects a day.
Don't forget to stop by Erica's blog to see 24 more projects today....
and every day in December.
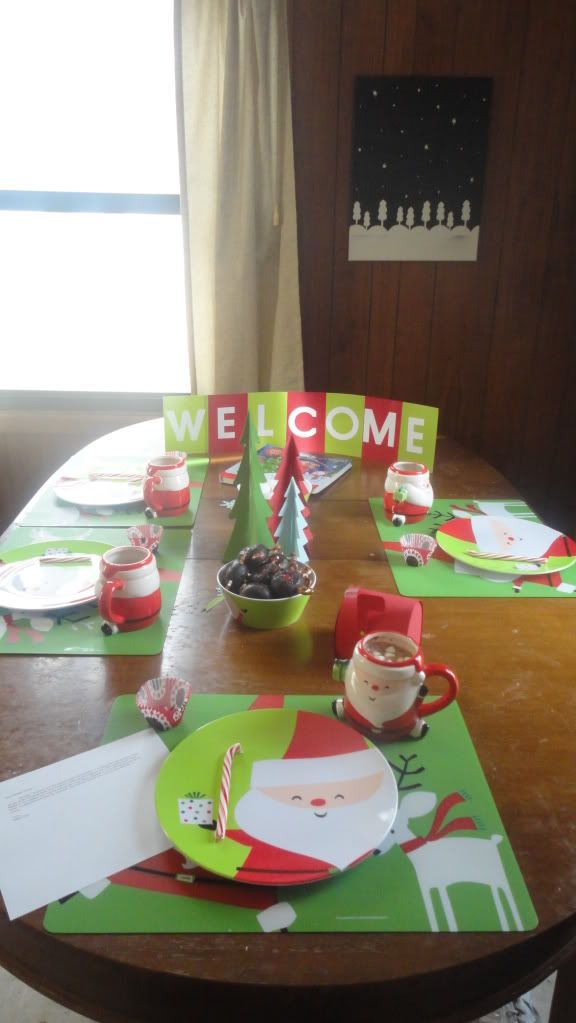
Today's theme was supposed to be kids but I couldn't come up with a good project and then life got in the way and . . . well to be honest I forgot! So here is a revisit of the North Pole Breakfast I made for my kids the day after Thanksgiving. You can find all of the details here.
Because this is a repeat I'm going to give you an extra entry into my blog candy giveaway for leaving a comment. If Random.org picks today or the day this project originally appeared I'll draw the winner from both days comments.
Make sure to become a follower and leave a comment on this and all of my other 25 Days of Christmas posts to be eligible to win my blog candy - the Gingerbread Cricut Cartridge! You can find all the details here (scroll all the way down).
Tuesday, December 20, 2011
25 Days of Christmas - Flowers
Welcome to Erica's Craft Room
25 Days of Christmas,
with 25 Cricut projects a day.
Don't forget to stop by Erica's blog to see 24 more projects today....
and every day in December.
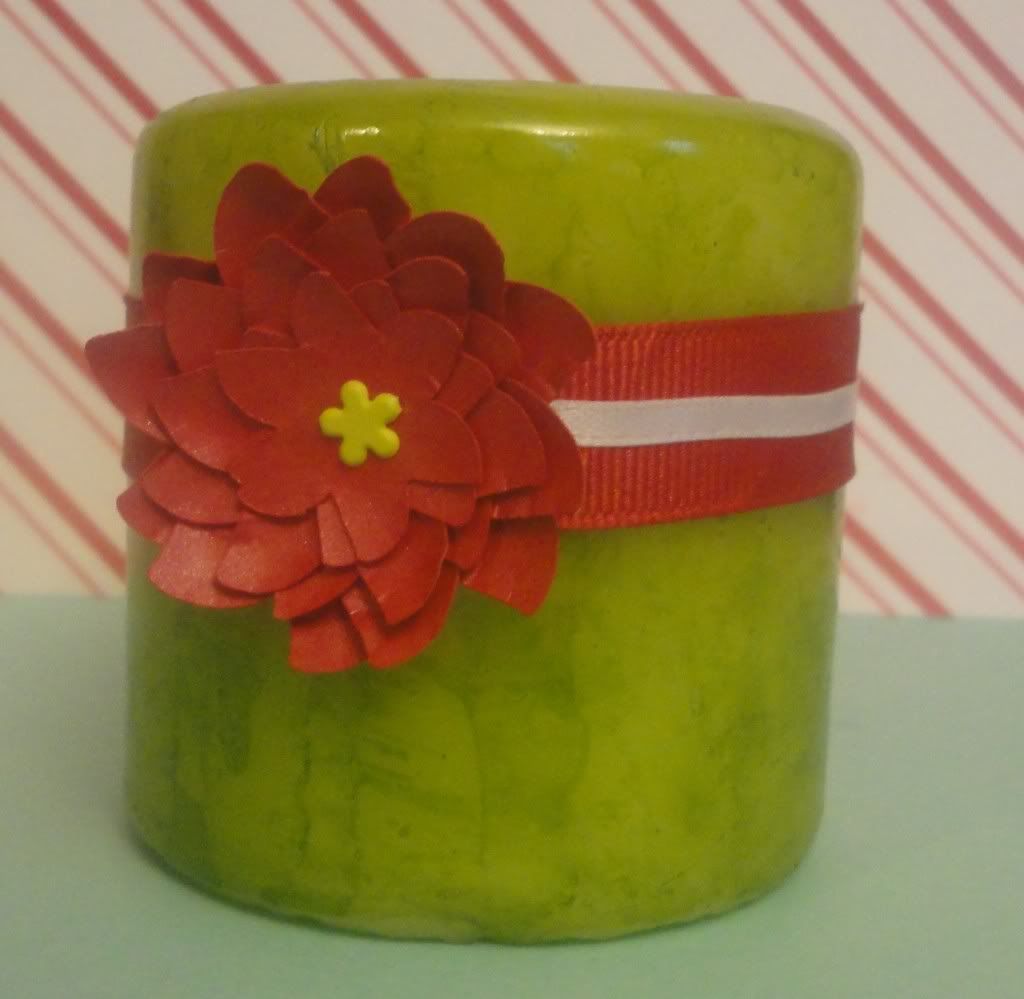
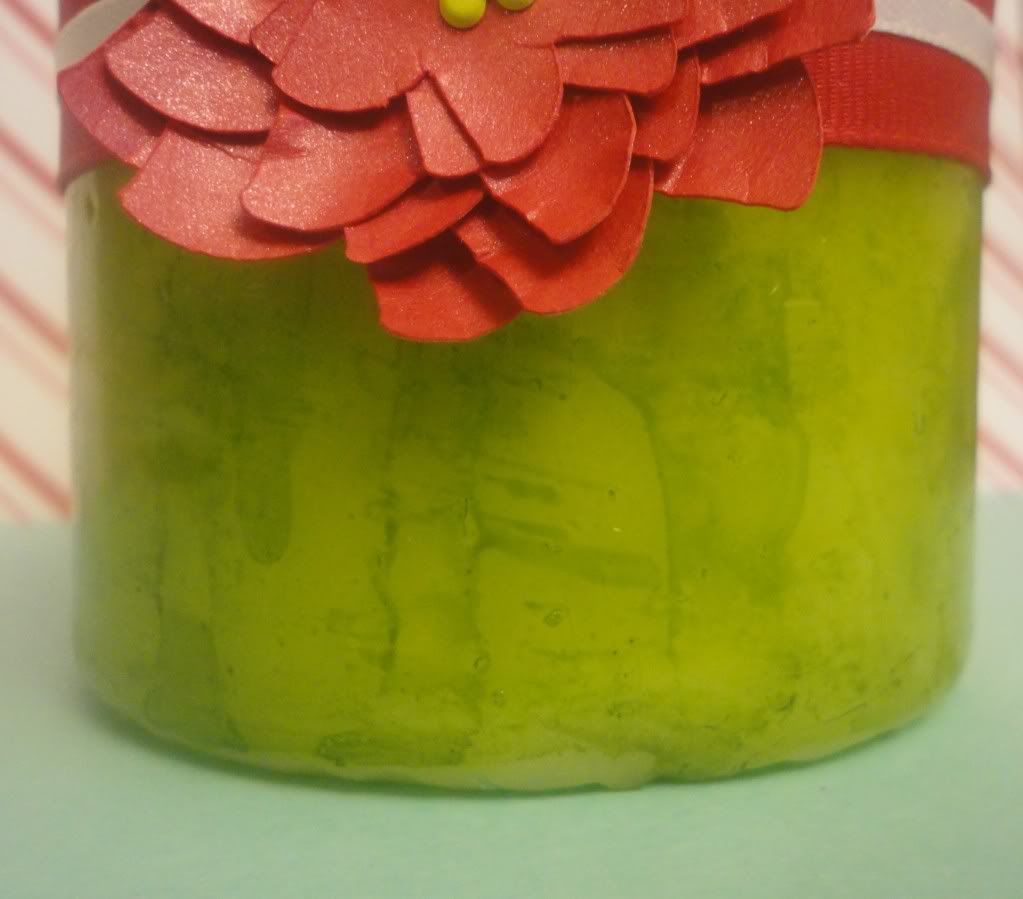
Poinsettias and candles say Christmas time to me so for my project today I combined the two.
Supplies:
Candle - mine was light pink to start with so color doesn't matter
Alcohol Ink - I used citrus
Plastic - this needs to be bigger than your candle - I used the plastic from an old Cricut mat but you could use plastic warp, a grocery bag, acetate, anything that the ink will sit on top of
Start by placing enough ink on the plastic to cover you candle. My candle was a 3" pillar and it took less than a teaspoon of ink. Roll you candle in the ink giving it a solid base coat. Let dry.
Once dry drip 1-2 drops of ink down the side of the candle. I only used one color but you could use as many as you want. Let dry.
Monday, December 19, 2011
25 Days of Christmas - Hot Chocolate/Coffee/Tea
Welcome to Erica's Craft Room
25 Days of Christmas,
with 25 Cricut projects a day.
Don't forget to stop by Erica's blog to see 24 more projects today....
and every day in December.
Today's project is a food item/gift.
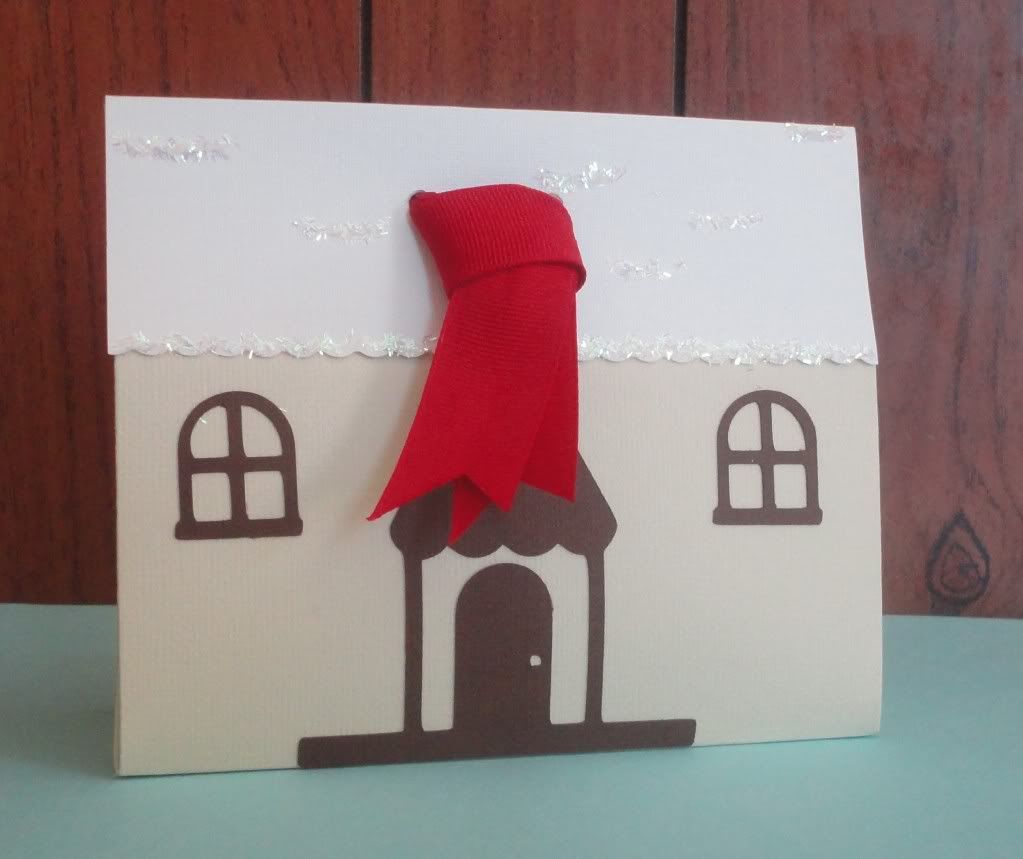
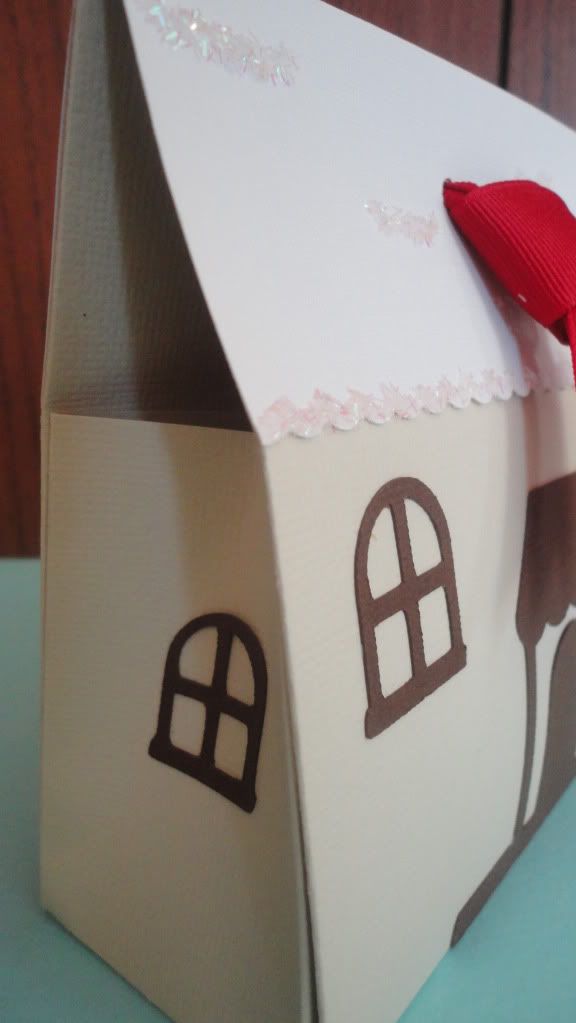
Is this not a super cute box?! The best part is that it is SO easy to make.
Start with a 12x12 sheet of cardstock.
Score at 3" and 9".
Turn the paper.
Score at 5" and 7".
Make your creases.
Here comes the one tricky part.
Fold at your 3" score.
Place your finger nail on the 5" score line. This is going to be one of the corners of your box.
Bring the end of that 5" score line/edge of the page to the 3" score line. You'll have made a diagonal fold on the inside of your box. Crease. (if you have any questions on this let me know and I'll try and get a good tutorial)
Repeat to create all four corners.
You can add glue if you would like but it's not necessary (I did glue mine).
Cut a piece of cardstock 4x6 for your roof.
Decorate your roof if you wish. I used glossy accents and course glitter.
Use April Showers to cut the door and windows at 6".
Punch holes through both the roof and the flap in the front and back.
Fill with hot chocolate packets (or gift of your choice).
Tie close with a piece of ribbon.
Make sure to become a follower and leave a comment on this and all of my other 25 Days of Christmas posts to be eligible to win my blog candy - the Gingerbread Cricut Cartridge! You can find all the details here (scroll all the way down).
Sunday, December 18, 2011
25 Days of Christmas - Elf
Welcome to Erica's Craft Room
25 Days of Christmas,
with 25 Cricut projects a day.
Don't forget to stop by Erica's blog to see 24 more projects today....
and every day in December.

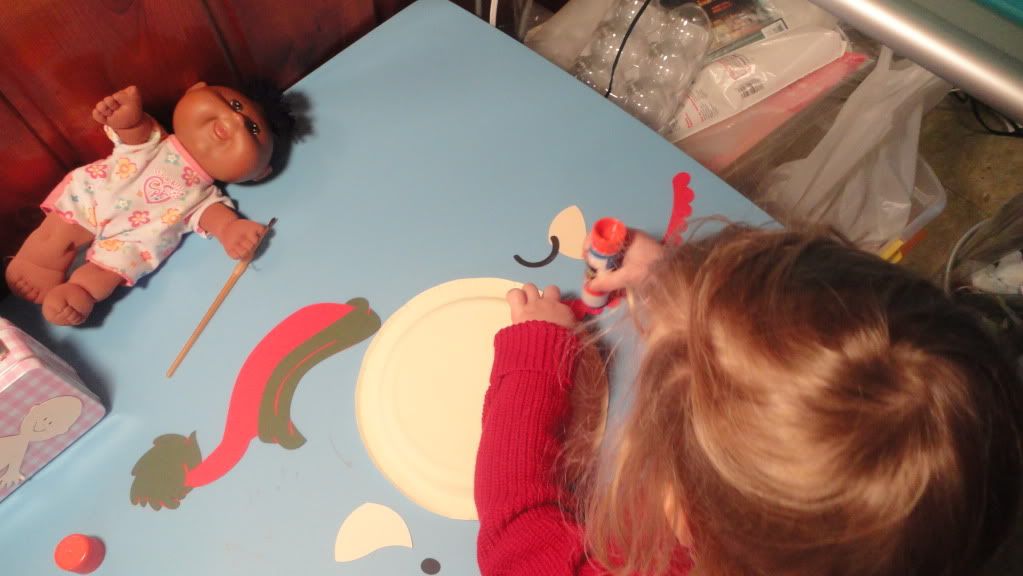
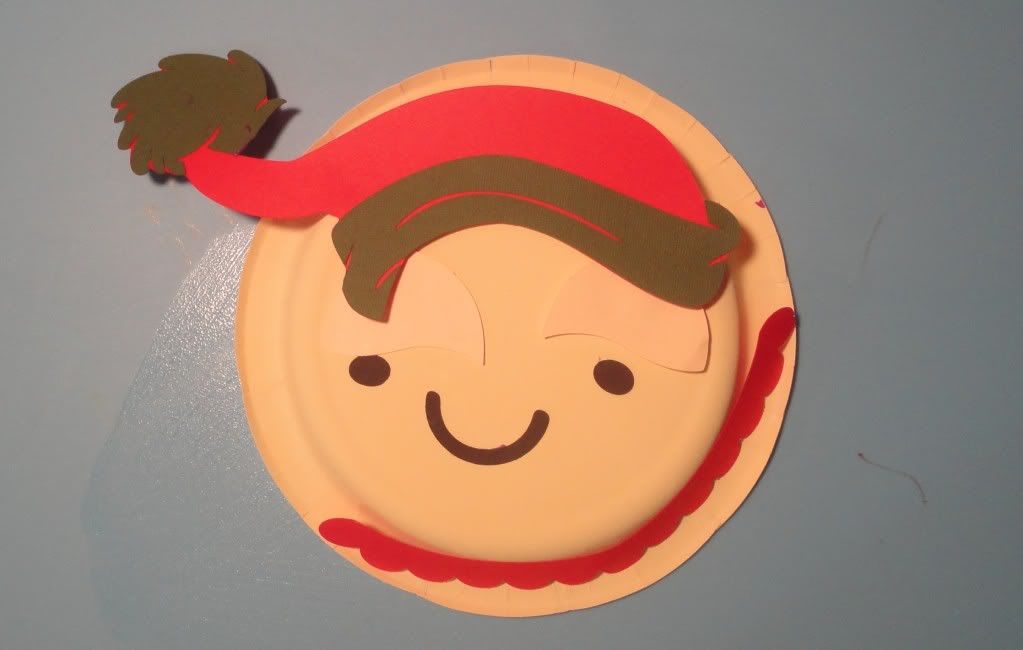
Hat - Pooh and Friends - 4" - page 60 icon
Face - Create a Critter - 13" - page 68 layer 1
Collar - Create a Critter - 4" - page 38 accessory<s>
Ears - Winter Frolic - 11" - page 63 layer<s> - make this cut twice, use the large bird and flip him upside down
Make sure to become a follower and leave a comment on this and all of my other 25 Days of Christmas posts to be eligible to win my blog candy - the Gingerbread Cricut Cartridge! You can find all the details here (scroll all the way down).
Saturday, December 17, 2011
25 Days of Christmas - Baking
Welcome to Erica's Craft Room
25 Days of Christmas,
with 25 Cricut projects a day.
Don't forget to stop by Erica's blog to see 24 more projects today....
and every day in December.
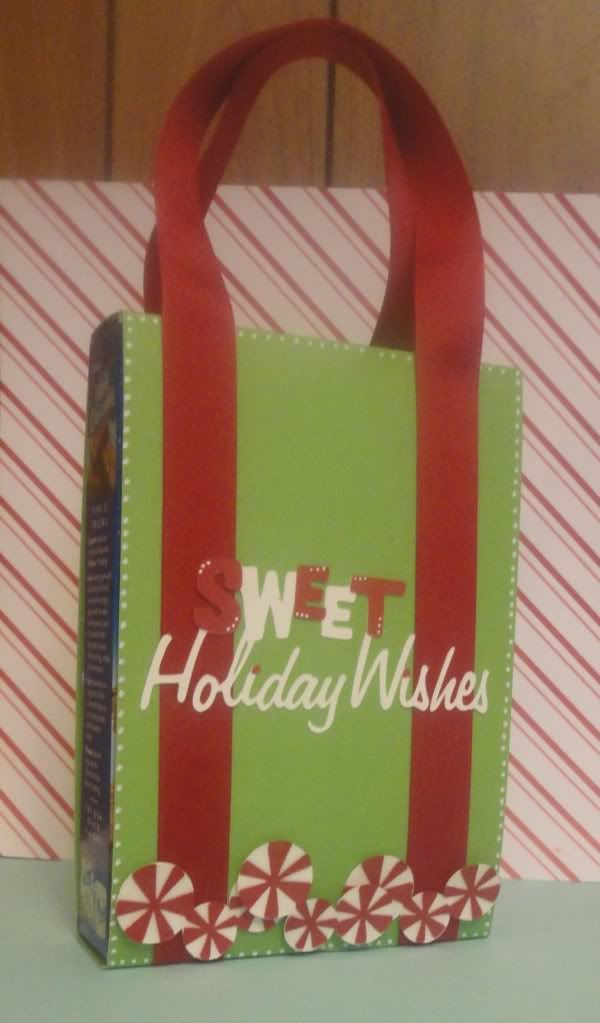
Boxed brownies/cake mix
2 pieces of cardstock large enough to cover the front, top and bottom of your box - mine are 10 3/4" x 5 3/8"
Score both pieces at 1 1/2" and 9 1/4"
Glue your flaps together creating a box around your mix - don't glue onto the mix just around
For the handles I cut a 55" piece of 1" wide ribbon and glued it to the bottom and sides of the holder.
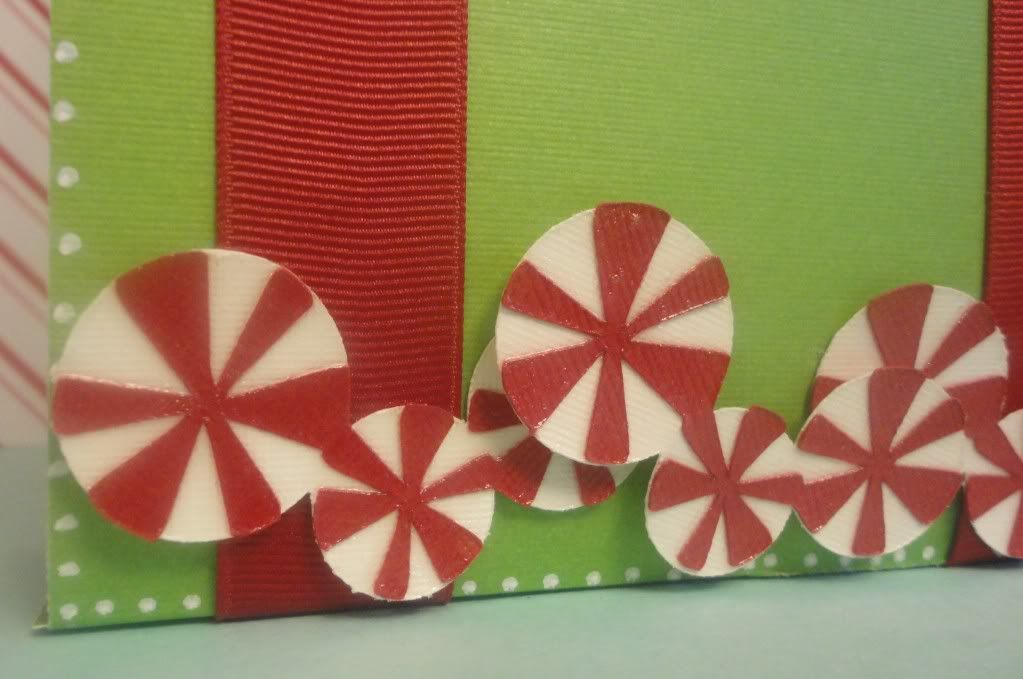
Now it's time to decorate. I used the Winter Frolic cart for my cuts. Sweet Holiday Wishes can be found on page 57. I made this cut at 2". The peppermint boarder is on the same page and I cut that three times at 1 1/4". I used a very light coating of glossy accents on the peppermints and used foam tape on the middle section. Then I took my white pen and created a dot boarder around all of the edges and highlights on the red letters in sweet.
Make sure to become a follower and leave a comment on this and all of my other 25 Days of Christmas posts to be eligible to win my blog candy - the Gingerbread Cricut Cartridge! You can find all the details here (scroll all the way down).
Friday, December 16, 2011
25 Days of Christmas - Candy
Welcome to Erica's Craft Room
25 Days of Christmas,
with 25 Cricut projects a day.
Don't forget to stop by Erica's blog to see 24 more projects today....
and every day in December.
For today's project I made this cute little treat holder.
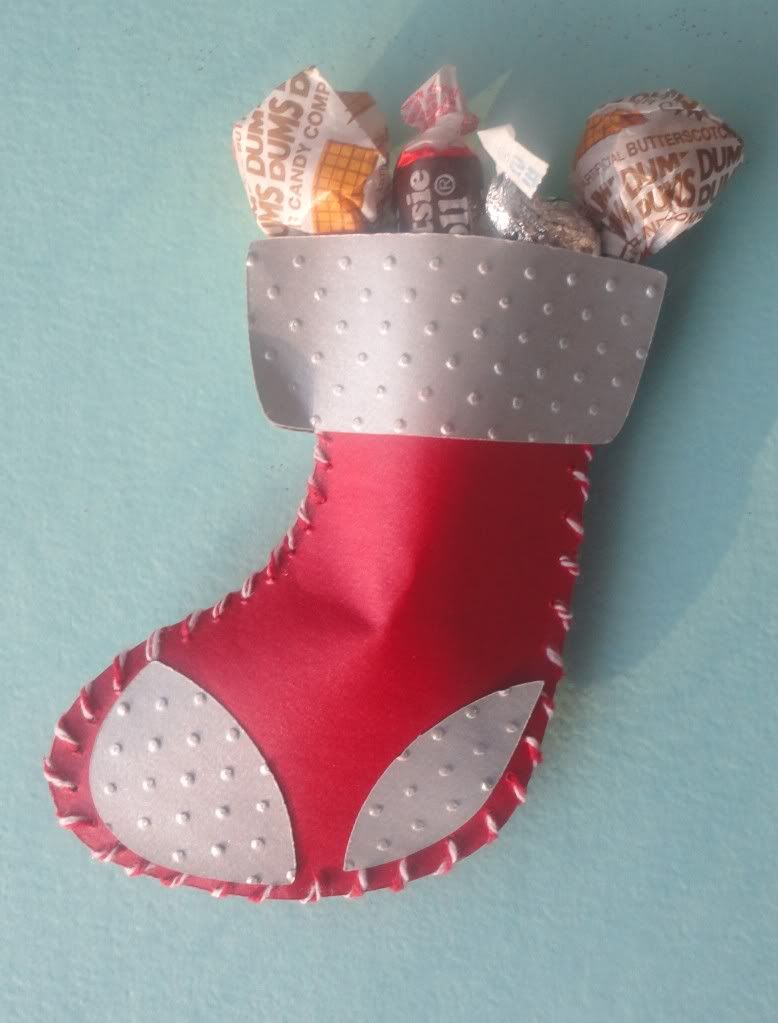
I used Winter Frolic to cut the stocking at 4". I made the cut twice, once with the flip feature on. I cut the items in the stocking off and embossed the trim pieces with the Swiss Dots Cuttlebug folder. I took candy stripe twine from We R Memory Keepers and stitched the two pieces together. I used irridescent paper for both the red and silver.
This little stocking can hold a surprising amount of candy.
Thursday, December 15, 2011
25 Days of Christmas - Trees
Welcome to Erica's Craft Room
25 Days of Christmas
with 25 Cricut projects a day.
Don't forget to stop by Erica's blog for 24 more projects
today . . .
and every day in December.
Here is my project . . .
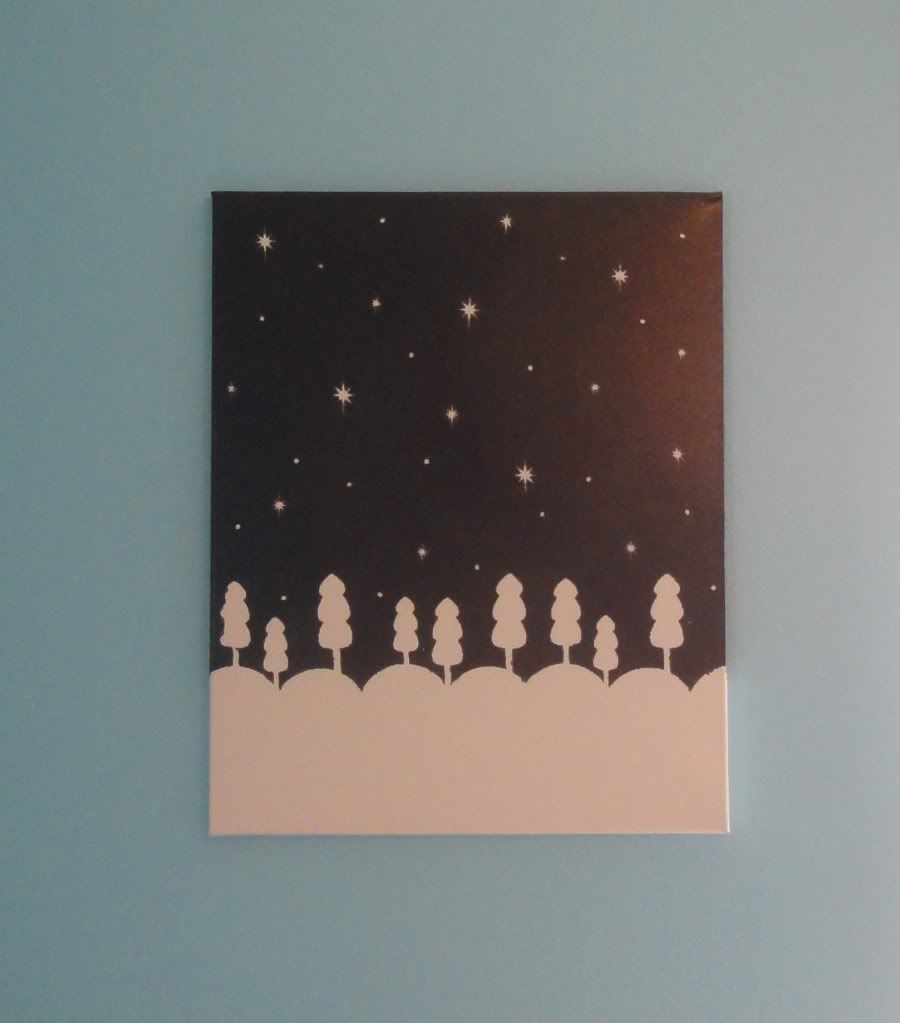
It's a canvas painting using contact paper and the Winter Frolic cartridge.
This project is incredibly easy and looks amazing (I actually made two).
To start with cut a piece of 12x12 contact paper. Leave the backing on and place on your circut mat.
Your cuts are as follows:
Trees page 40 - boarder - 4" - 2
Stars page 71 - boarder<s> - 1 1/4" - 5
Circles page 48 - layer - 3" - 3
Place on canvas.
Spray paint.
Peel off.
Display your work proudly.
It's that simple! I hope you'll give this a try. As an FYI I tried this with vinyl and it didn't keep the paint out as well as the contact paper.
Make sure to become a follower and leave a comment on this and all of my other 25 Days of Christmas posts to be eligible to win my blog candy - the Gingerbread Cricut Cartridge! You can find all the details here (scroll all the way down).
Wednesday, December 14, 2011
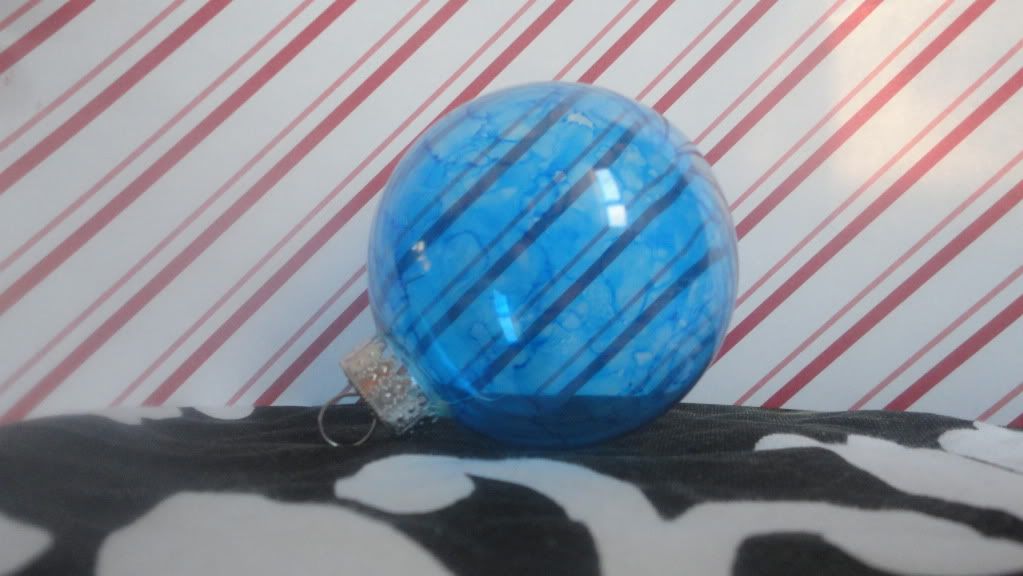
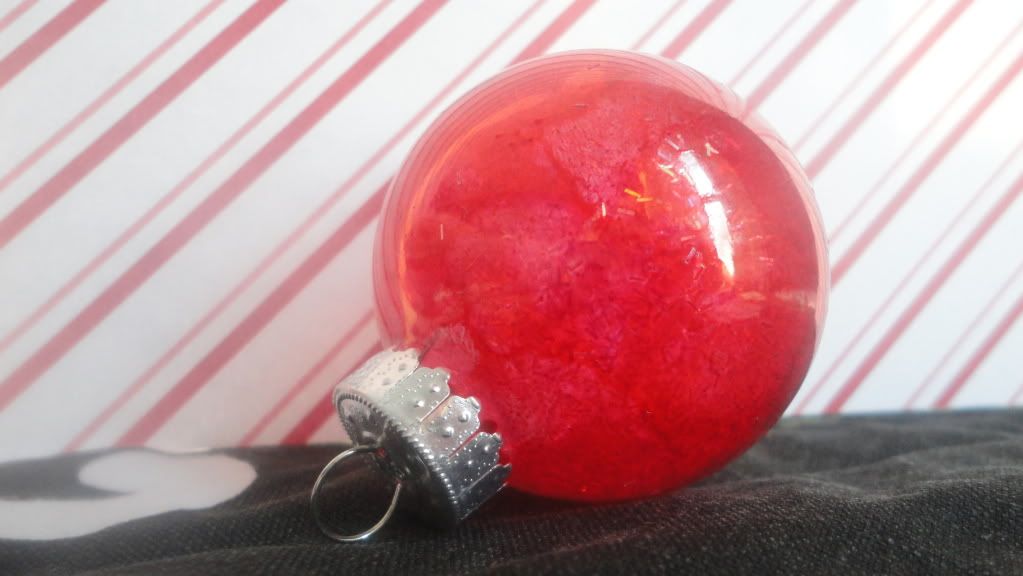
25 Days of Christmas - Ornaments
Welcome to Erica's Craft Room
25 Days of Christmas,
with 25 Cricut projects a day.
Don't forget to stop by Erica's blog to see 24 more projects today....
and every day in December.
I've made another Made With Kids project today that both my 3 year old and 18 month old love!
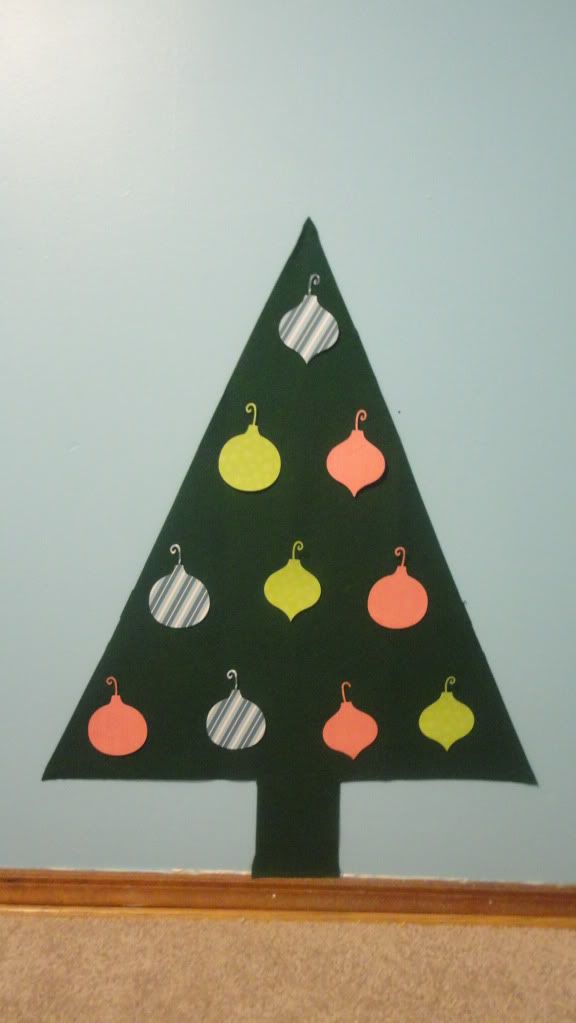
The tree is cut from felt and held on the wall with sticky tack.
I used my Winter Frolic cart to cut both shapes of ornaments out of patterned paper at 4". Then I simply glued a scrap of felt to the back of each one.
Now my kids can decorate and undecorate their own Christmas tree whenever they want and leave the family tree alone (in theory any way).
Make sure to become a follower and leave a comment on this and all of my other 25 Days of Christmas posts to be eligible to win my blog candy - the Gingerbread Cricut Cartridge! You can find all the details here (scroll all the way down).
Tuesday, December 13, 2011
25 Days of Christmas - Penguins
Welcome to Erica's Craft Room
25 Days of Christmas,
with 25 Cricut projects a day.
Don't forget to stop by Erica's blog to see 24 more projects today....
and every day in December.
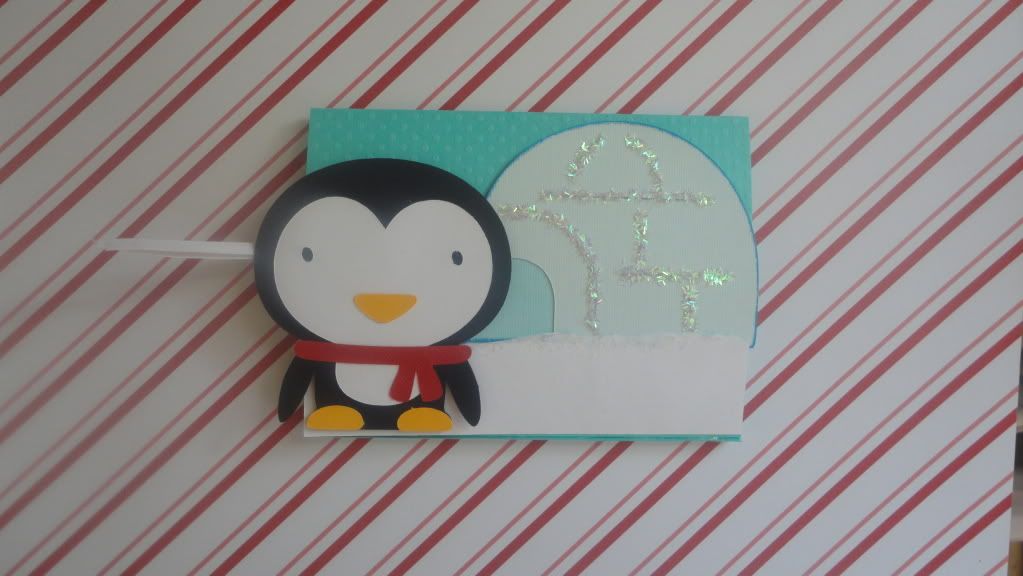
Sorry the video randomly cut off. What you want to do to finish is place the glue on the opposite side of where you say me starting to place my glue and the line that edge up with the front lip of your card and you're ready to go! I hope you enjoyed my little video, I know it wasn't the best but it was kind of fun to make.
Monday, December 12, 2011
Blog Hop Winner
*If you're looking for my 25 Days of Christmas post scroll down*
Thank you, everyone, for joining me this weekend on the Christmas Decorations Blog Hop hosted by Creations With Becka.
I also wanted to say thank you to Becka for including me in this hop. I had a lot of fun making my centerpiece and getting to meet so many new crafters.
Now on to the winner of the Recollections stamp set.
Random.org chose lucky number 11 and that person is . . .
SHERSL84BED
Congratulations Sher! Since you left me you email address I'll send an email out to you now and you'll have 48 hours to reply.
Thank you again to everyone who stopped by! Remember you still have a chance to win the Gingerbread Cricut Cartridge (details at the bottom of this post)! Also Becka is VERY close to reaching 850 followers and is having a BIG giveaway to celebrate. Jump on over to her blog for all the details.
25 Days of Christmas - Snow
Welcome to Erica's Craft Room
25 Days of Christmas,
with 25 Cricut projects a day.
Don't forget to stop by Erica's blog to see 24 more projects today....
and every day in December.
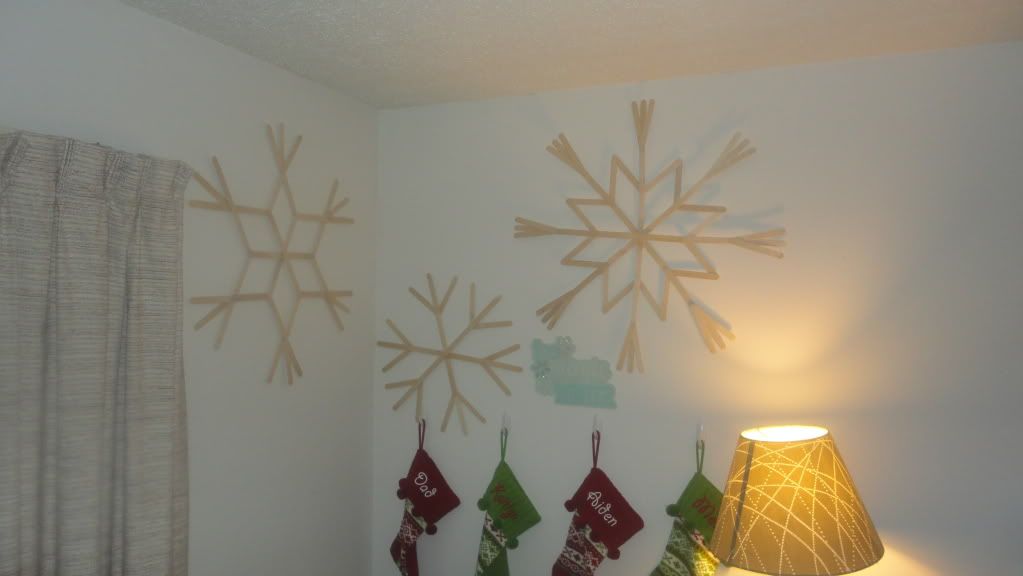
I've been wanting to do this project since last year but didn't think I had the time. When I finally took the time to sit down with my popsicle sticks and glue gun it took me no time at all. The longest part was deciding what pattern to use. You can do a quick Google search to find different shapes, copy mine or make up your own.
I left my snowflakes natural but you could paint them with either acrylic paint or spray paint (this may be the easier, quicker option).
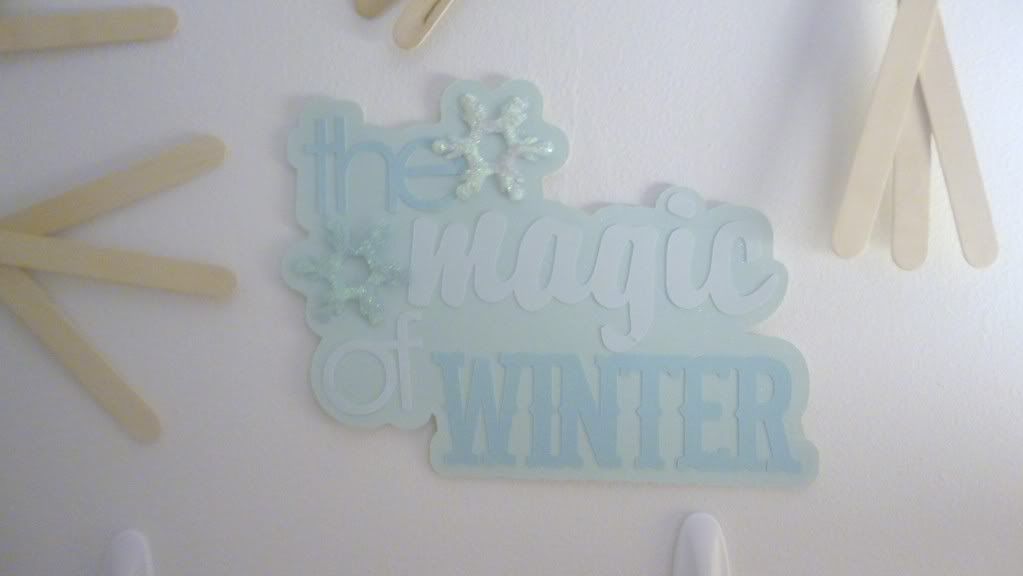
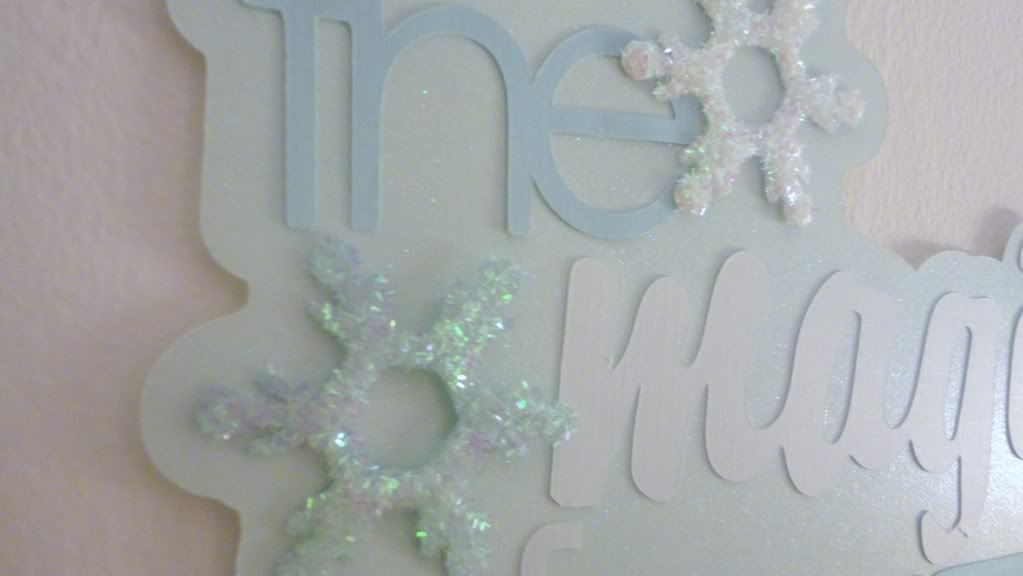
For my sign I used page 68 of the Winter Woodland cart. I cut the words and snowflakes twice to get two different colors. The base layer is cut out of glitter paper. I used glossy accents and course glitter on the snowflakes for texture and dimension. All pieces are cut at 7". All of my cardstock is Recollections.
Make sure to become a follower and leave a comment on this and all of my other 25 Days of Christmas posts to be eligible to win my blog candy - the Gingerbread Cricut Cartridge! You can find all the details here (scroll all the way down).
Sunday, December 11, 2011
25 Days of Christmas - Day 11
If you're looking for my Christmas Decorations Blog Hop post click here or scroll down.
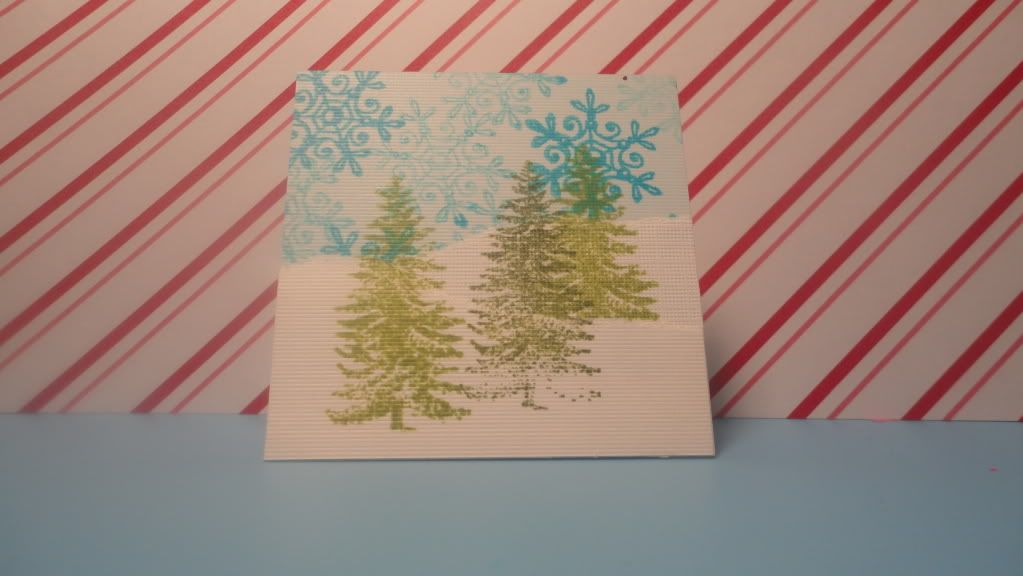
Today I have a cute little tag for you. This is simple to make and takes very little time.
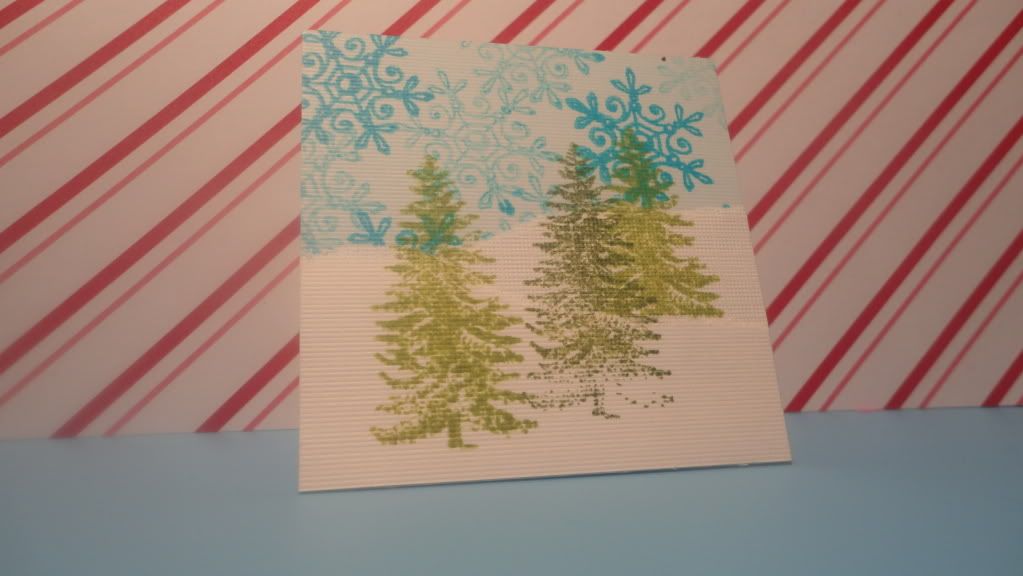 The tag measures 3x3. I used Recollections cardstock so it has a slight texture to it. I started with the blue piece and stamped the Inkadinkadoo snowflake all over. Then I took a piece of white cardstock and tore it to create my mounds of snow. I applied the taller layer first, stamped my Me & My Big Ideas tree and then applied the second layer of white and stamped my two other trees. I used Recollections ink for the blue and light green. The darker green is distress ink.
 Make sure to become a follower and leave a comment on this and all of my other 25 Days of Christmas posts to be eligible to win my blog candy - the Gingerbread Cricut Cartridge! You can find all the details here (scroll all the way down).
Today I have a cute little tag for you. This is simple to make and takes very little time.
Saturday, December 10, 2011
Christmas Decorations Blog Hop
WELCOME
to the Christmas Decorations Blog Hop hosted by Creations With Becka.
If you're here from Susan's blog, great! you're in the right place. If you happen to have just stopped by to say hi, then please join us for the whole hop (you can start here). Please be sure to leave a comment at each stop on the hop to be eligible to win the grand prize - a Cricut cartridge!
For my decoration today I made a centerpiece for my dining room. This was a lot of fun to make because
1) I got to do a lot of experimenting with a new-to-me product (alcohol ink) and
2) I got to sample three yummy wines (the sacrifices we make for our crafts)
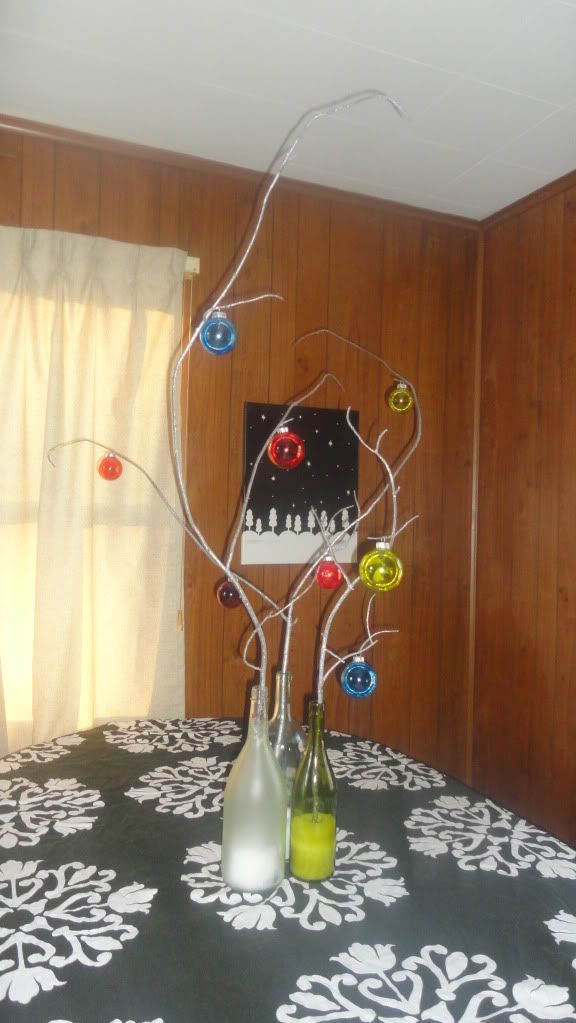
See that picture in the background, I made that too! Follow my blog to find out how.
To start I cleaned the bottles and removed the labels. After they were dried I poured some epsom salt in (found in the first aid isle at Target). The branches were found in my backyard and I spray painted them with silver glitter paint. I used two cans, this is a good use for those Michael's coupons.I used a few different techniques on the ornaments.
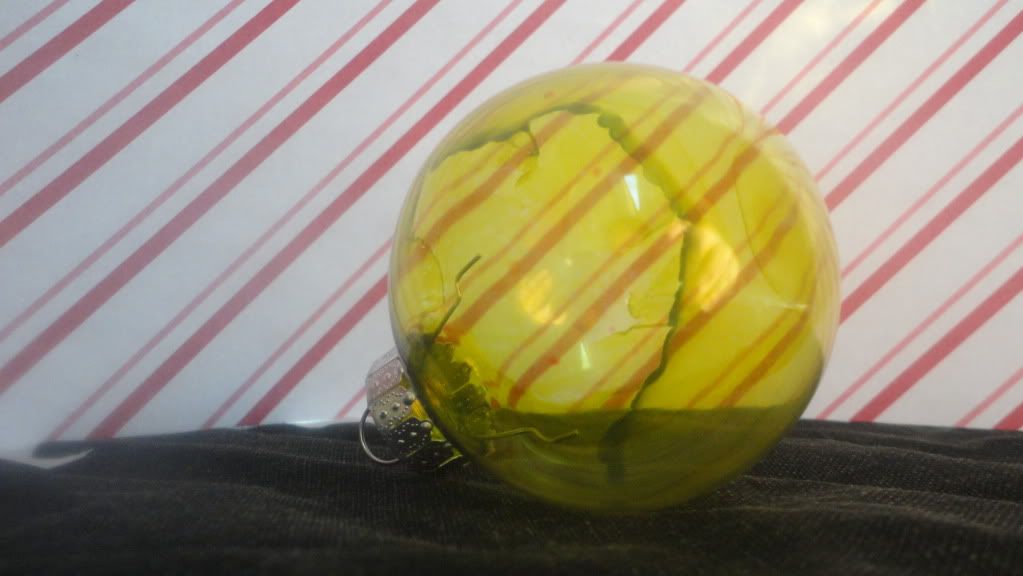
I only had one shade of each color (watermelon, sail boat blue and citrus) but if you have multiple shades of ink you could really get some nice dimension.

1) Be a follower
2) Leave me a comment on this post
I will draw a winner on Monday (12/12) and that person will have 48 hours to contact me and claim their prize.
Your next stop is Dana.
Here are all the stops on the hop (in case you get lost)
Remember you must comment on every stop to be eligible for the grand prize.
may I suggest you keep reading *wink* *wink*
Becka http://creationswithbecka.
Oma Gloira http://omascrafts.blogspot.com
Julie K http://jk-littlebitofbling.
Beckie Woodal lhttp://justbcreativecrazy.
Jamie Larson http://babyjaydensmommy.
Lisa Grave http://lisa-scrappingspot.
Anna Bee http://annabeedesigns.blogspot.
Crystal Kovach http://crystal-kovach.
Susan http://cricutandgrasshopper.
Tonya Morgan http://ittybittyladybugs.
Dana Tarchala http://Danascraftycorner.
FYI the lineup has changed slightly but there are still 11 of us to stop at. Please be sure you've commented on 11 blogs so you can be eligible for the grand prize.
I'm glad you stayed with me, and I think you'll be glad too! Since it's Christmas I thought it would be nice to give a little gift to one of you! This Gingerbread Cricut Cartridge!!!
Friday, December 9, 2011
25 Days of Christmas - Animals
Welcome to Erica's Craft Room
25 Days of Christmas,
with 25 Cricut projects a day.
Don't forget to stop by Erica's blog to see 24 more projects today....
and every day in December.
I am in love with this cute little project!
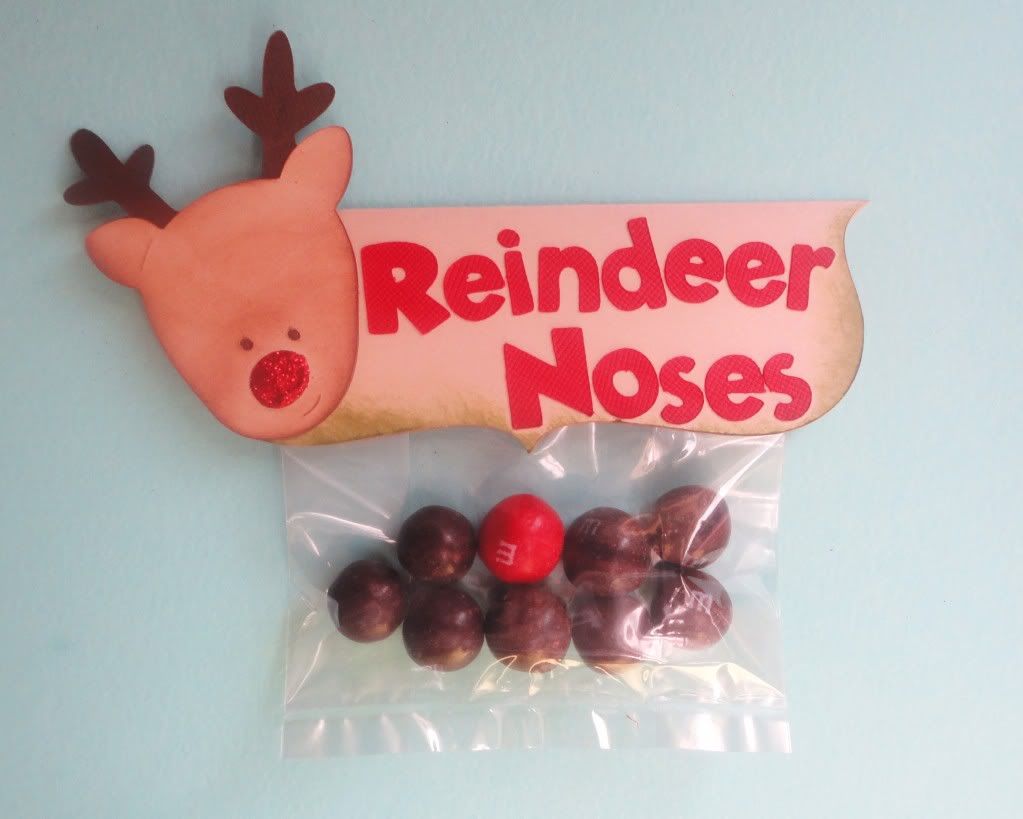
I used Create a Critter to cut the base of my label at 4". This cut can be found on page 33 on the phrase button. I inked the edges with Tim Holtz distress ink in peeled paint.
That super adorable reindeer is on the Doodlecharms cart. He's hiding on page 126 and I cut him at 3". He's inked with brown chalk ink. His little nose is glossy accents with Martha Stewart glitter.
For the font I used Mickey Font and cut it at 3/4".
Inside the bag are pretzel M&Ms.
Please be sure to stop by my blog this weekend for a chance to win some blog candy! I also have a big announcement to make!
Wednesday, December 7, 2011
25 Days of Christmas - Calendar
Welcome to Erica's Craft Room
25 Days of Christmas,
with 25 Cricut projects a day.
Don't forget to stop by Erica's blog to see 24 more projects today....
and every day in December.
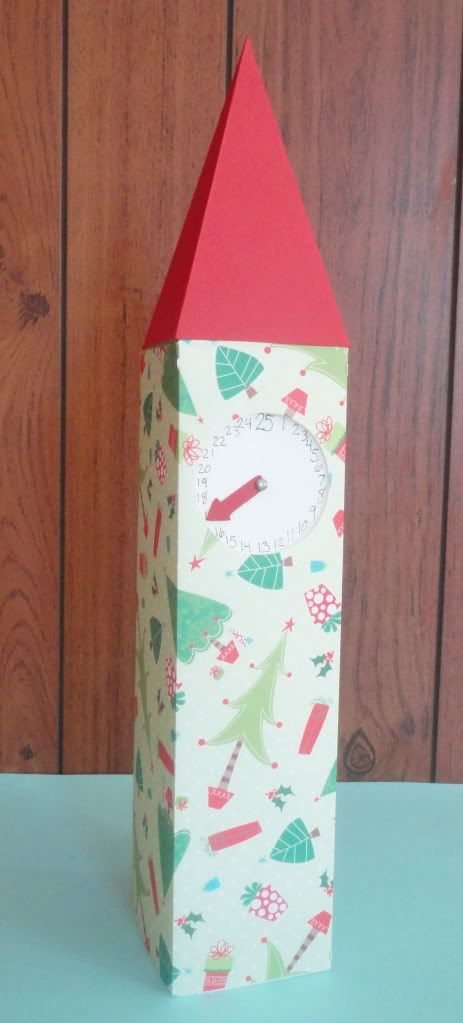
Here are the steps in the order I should have made my countdown clock tower in.
1) Using Winter Woodland cut all layers of 3D Building 7 (clock tower) at 10" (this is as big as you can make it with a 12x12 sheet of paper. I used Recollections cardstock for the inner layer of my clock and Recollections patterned paper for the outside. The roof is cut out of Bazzil textured cardstock.
2) I used my Martha Stewart score board to make sure my folds would be straight. Before you fold anything though mark on your CS where the clock face hole will be and write your numbers. Also mark the center of clock face and use your paper piercer to make a hole. This is a good time to make a hole at the base of the longest clock hand too.
3) Now pick out a brad and put your clock hand on your clock face. Make sure you can move the hand freely but still have it stay on the number you want.
4) Make all of your folds. Go ahead and glue the inside and outside layers of the tower but NOT the roof. Place glue on the glue tabs of the tower that will hold the roof and also the glue tab of the roof but don't glue the roof together. Now place glue tabs of the tower on the roof and glue the roof together. (This is much easier than trying to get the glue tabs of the tower to stick to an already assembled roof . . . trust me.)
5) I added a little glue to the inside tower to hold the outside tower on and make it more like one piece.

Now you're ready to count down to Christmas.
25 Days of Christmas - Warm Clothes
Welcome to Erica's Craft Room
25 Days of Christmas,
with 25 Cricut projects a day.
Don't forget to stop by Erica's blog to see 24 more projects today....
and every day in December.
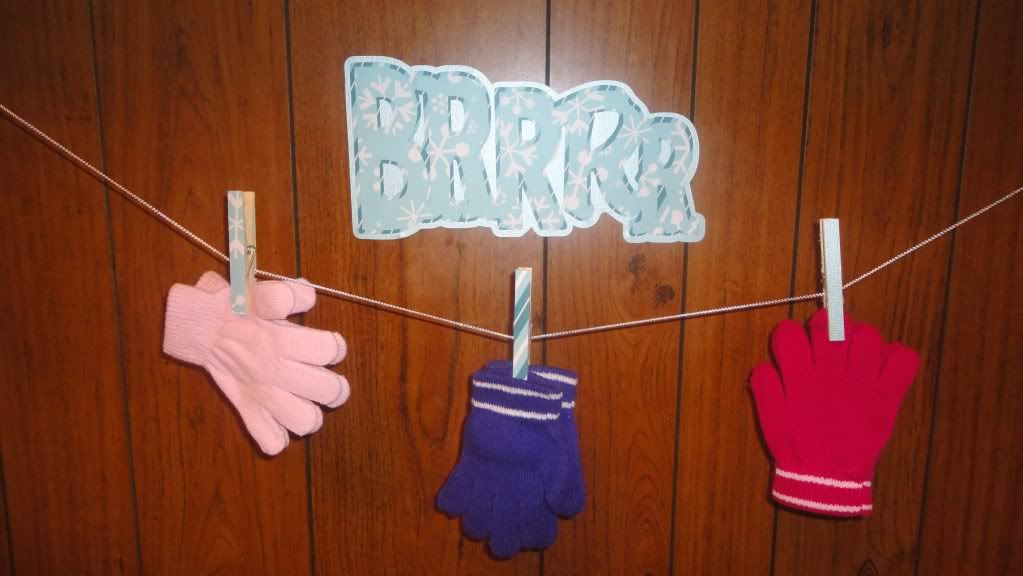
For my project I made a clothes line to hang all of my families hats and mittens on. This has been a wonderful project. I no longer have to hunt down the missing glove or hat. It's also a great fine motor skill project for my daughter.
Be sure to become a follower. I have a big announcement coming up on Saturday. As a fellow Cricut lover you'll not want to miss it!
Subscribe to:
Posts (Atom)