Thursday, May 31, 2012

Creative Cutter Room - Photo Inspiration

Thank you for joining us for our new challenge! We saw some great Graduation cards and projects during our last challenge! We appreciate you joining us and hope you will join us for this next challenge! 

Theme: Photo Inspiration!


Here is my project:
I used vinyl and Gypsy Wanderings to add some additional detail to my daughter's bedroom door. The branch is cut at 3.71" and the flowers are cut at 2.89".

Challenge Starts today May 31 and runs until June 13, 2012.

Follow the rules then submit your new project over at the


Looking forward to seeing your creations!

Only entries that fit the challenge guidelines will be entered to win the prize!

The Prize:

Here is the Line Up You for some great inspiration:

Nicolette's Birthday Bash Blog Hop - Disney Themed

Happy Birthday Nicolette!!!!


Today and tomorrow we're celebrating Nicolette's birthday and one of her favorite things . . . DISNEY!!!

If you came here from Jaime's Blog you're in the right place. If you just stopped by and want to join in the fun hop on over and start with the birthday girl herself, Nicolette.

Today I'm sharing a birthday layout with you. If you're a reader of my blog then you know I threw a Mickey Mouse birthday party for my now 2 year old son a couple weeks ago. To make this layout I took apart the welcome sign that I made for the party and used the elements to create my layout. This is one of my FAVORITE decorating/scrapping tricks. I think it just makes sense. You spend all that time making decorations for the party you may as well make them last and preserve them!

Wednesday, May 30, 2012

My Cricut Craft Room - Fibers

My Cricut Craft Room
Today the design team and I will be featuring fibers or canvas on our projects. I used both a grosgrain ribbon and satin fabric on my card.

I previously used Art Philosophy to cut the tag shape out of my Lawn Fawn cardstock. When I was searching for paper to use on this project I came across the full sheet of paper with this shape cut out of it and instantly a light bulb went off.

I backed the cutout with my satin fabric and added some stability by cutting a scrap piece of paper and adding that to the back as well.

My images are from three Lawn Fawn sets and were previously a card on their own. Then my son got a hold of it and smudged the ink. So I used my detail scissors and cut out the images.

I used foam adhesive to create a dimensional banner with my ribbon that I had stamped my sentiment on with VersaMark ink.

I hope you enjoyed my project today! I encourage you to stop by Erica's Blog to see what the rest of the design team has created using fibers.

Friday, May 25, 2012

My Cricut Craft Room - Christmas Scrapbook

Today I have a 2010 Christmas layout to share with you (I'm so far behind on scrapping my Christmas photos!). On Christmas Eve in our family the kids get to open their special Christmas Jammies right after church with Grandma and Grandpa and before we have dinner. This helps quell the "When do we get to open presents?" question.

Cut List:
Accent Essentials
   Frame - 5.6" x 8.2"
   Mat - 4.5" x 4.5"
Winter Frolic
   "Christmas Jammies" - 1.16"
Paper Doll Dress Up
   Reindeer - 4"
   Tree - 2.54" x 3.82"
Create A Critter
   Present - 2.06"

I hope you enjoyed my non-traditional Christmas layout. Please stop by MyCricutCraftRoom.blogspot.com to see even more Christmas layouts created by the design team.

Wednesday, May 23, 2012

Mickey Mouse Birthday Party

Well the party was a success! The weather didn't cooperate as much as I would have liked but it was still a nice day to celebrate my little man with family.

The party was at 1:30 so I served lunch. We had Mickey Mouse Clubhouse Sandwiches. I managed to cut the meat into a Mickey shape but the cutter I bought was too large for the cheese or bread. I was a little bummed about that but, whatever. We also had chips, fruit and fruit dip (one jar marshmallow creme + one brick cream cheese = yummyness).  Instead of cake for dessert (we had that on his actual birthday) we did build-your-own fruit pizzas.
The decorations were placed on the fly because I had planned for us to be outside but ended up inside for the beginning of the party. Here's the banner I made.
The Mickey heads are cut at 5.15" from Mickey and Friends. To make the rosettes I used two pieces of 9" x 1.5" cardstock. I scored it every 1/4". The letters and their shadows are cut at 2.53" from Mickey Font. The yellow letters are mounted on pop-dots, everything else is held together with Glossy Accents. I used Glue Dots to get the heads on the ribbon.

I hung up three clusters of Mickey icons around my living room. It's not what I had planned but it worked.
Foot - Mickey and Friends - 5.82"
Pants - Micky and Friends - 8.76"
Hand - Mickey and Friends - 8.88"
Oh Boy! - Mickey and Friends - 2.3"
Profile - Mickey Font - 8.24"
Hand - Mickey and Friends - 5.72"
Hand - Mickey and Friends - 9.13"
Mickey Mouse - Mickey Font - 4.65"

And of course I had my Welcome Sign.

Thursday, May 17, 2012

Creative Cutter Room - Graduation


Thank you for joining us for our new challenge! We saw some Beautiful Mother's Day projects during our last challenge!  We appreciate you joining us and hope you will join us for this next challenge!
Theme Graduation!

It is so hard to believe that graduation is upon us! The school year went so fast! Today is my little girl's last day of Practice Preschool. It also happens to be my son's 2nd birthday!

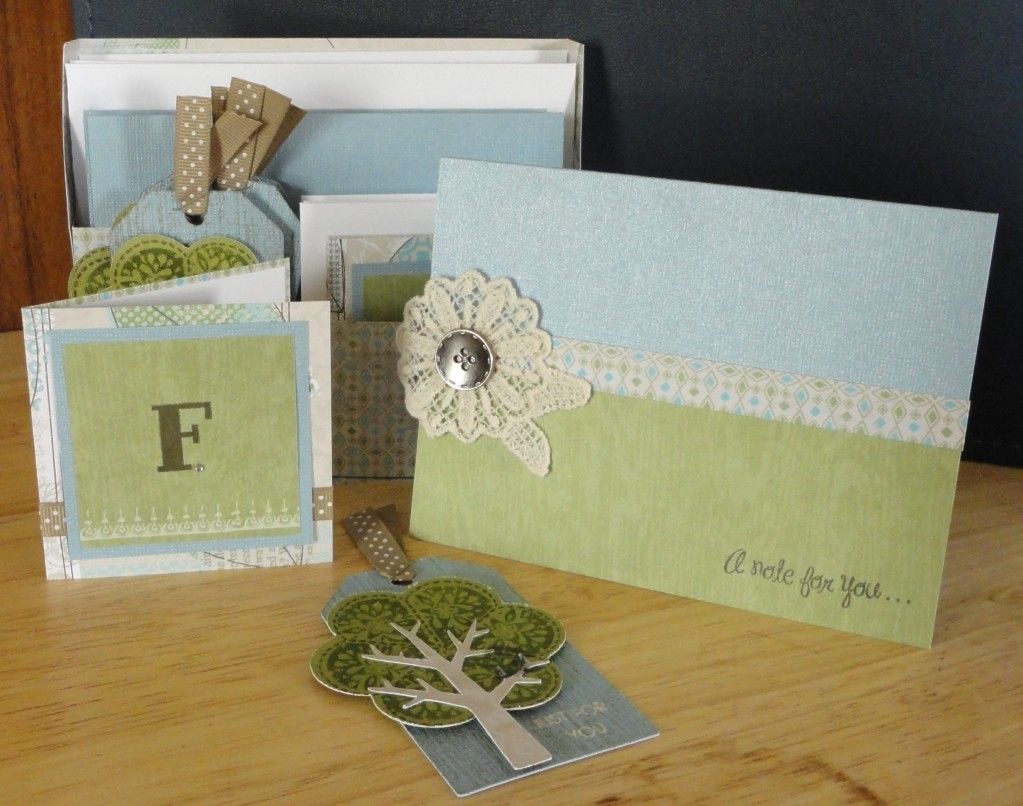
The project I made to share with you today is is mortar board hat box (made with Sweet Tooth Boxes) and a mini photo album that is the perfect size for the graduate to store the senior pictures from all their friends.
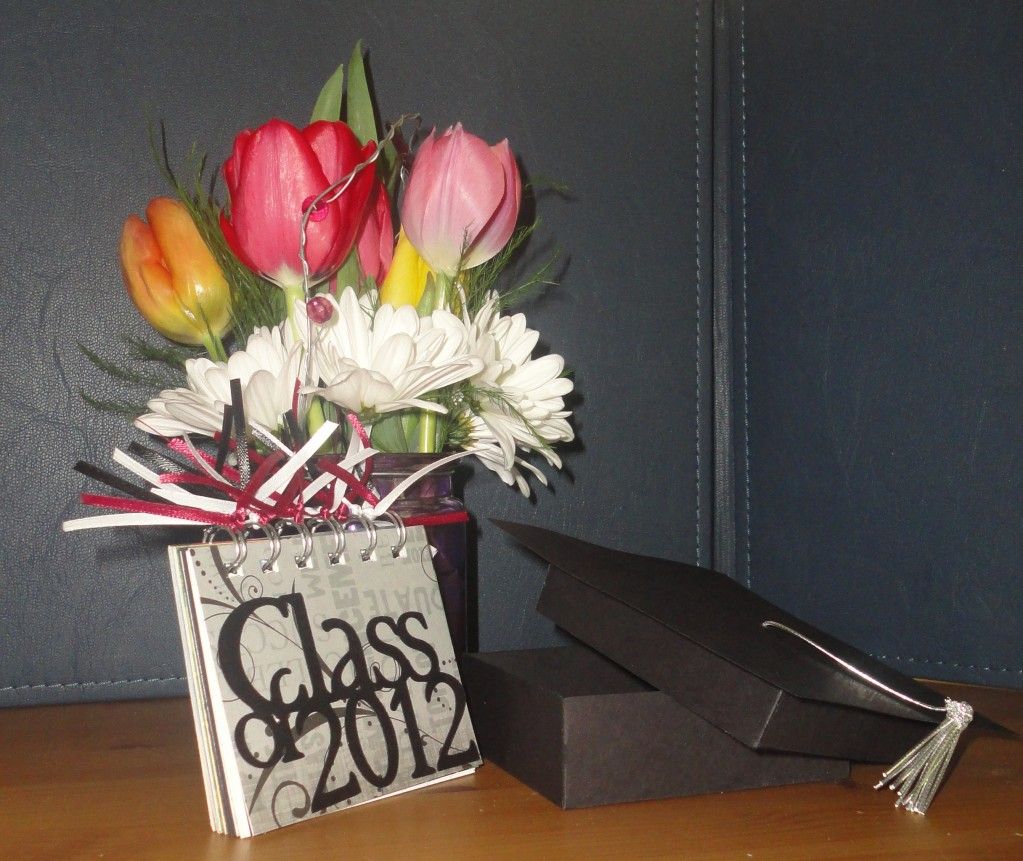
For the photo album I used my trusty Gypsy and Cricut Classic Font to create the "Class of 2012" word art. I started by working with the word Class. I grabbed my letters from my font cartridge, and while to the letters were still grouped, I zoomed in (hold the upper silver key and tap) and adjusted the spacing between the letters. I did this by tapping the button that looks like this "K_E" on the advanced tab until my letters were just overlapping. Then I welded them together. This allows me to cut the word out as a phrase instead of individual letters. I did the same with the word "of" and then welded that to the word class. I wanted 2012 to still have spaces between it so I kept the spacing given after grabbing the numbers from the cartridge and welded them to the bottom of "class".


Each page of the photo album can hold one wallet size photo. The graduate can also have his/her friends sign the upper page of the album. This will leave them with a nice keepsake consisting of a photo and signature/memory.


For the mortar board box I used Sweet Tooth Boxes and cut out the last box with a solid top. Then I simple cut an extra piece of cardstock 1" larger than the top. The tassel is cording tied together and strung through the center of the hat.

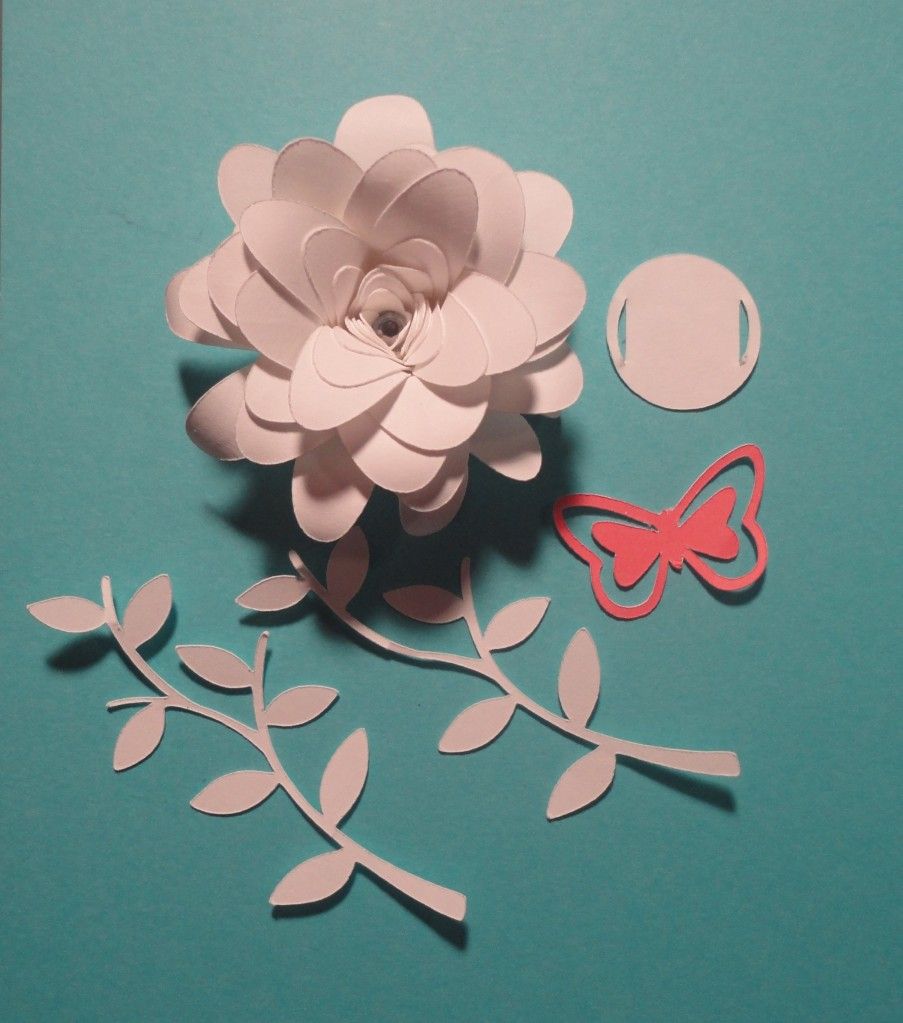
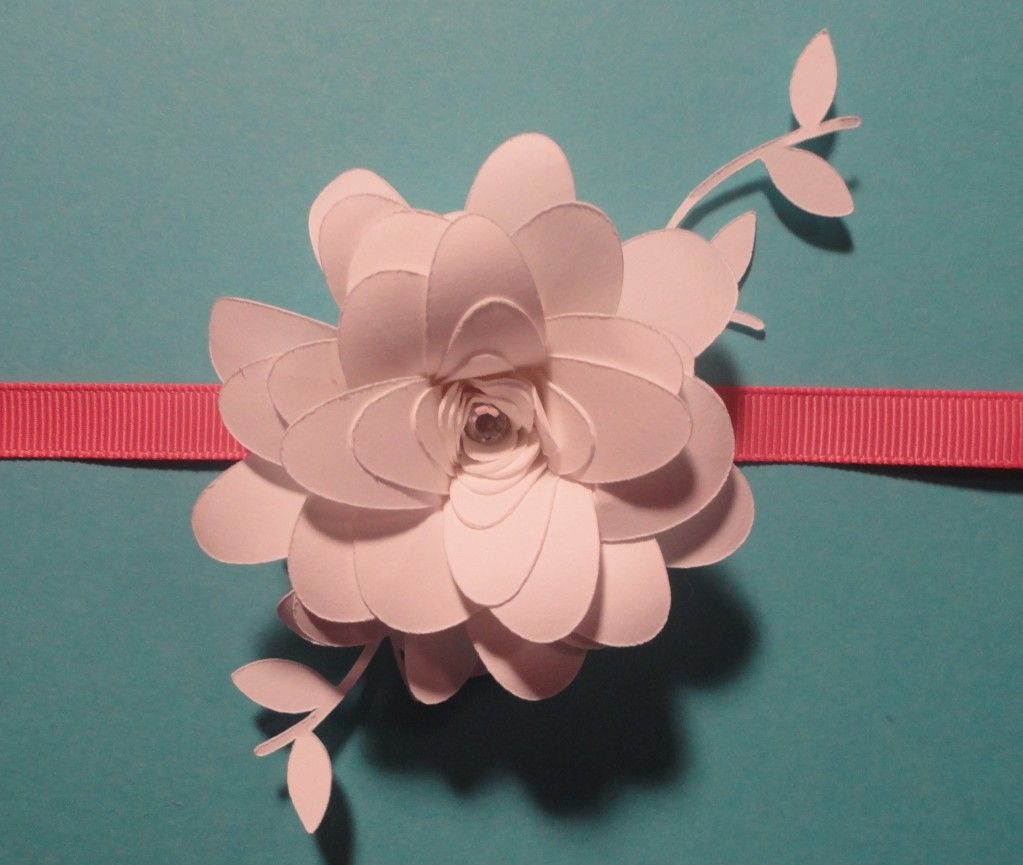
Cathie with CCR supplied the Design Team with some great paper, ribbons, a wall plaque, and embellishments to work with for this challenge.


 Here are the supplies we received:
We hope you will join us and Submit your new project for a chance to win a prize! 


THE PRIZE

Stamps and ribbon!


Challenge Starts today May 17 and runs until May 30, 2012.
Follow the rules then submit your new  project over at the

Looking forward to seeing your creations! 
Only entries that fit the challenge guidelines will be entered to win the prize!
  
Some Rules to keep in mind while playing along:
Project submissions must be new, no back linking
CCR must be mentioned in the description with a link back to here
Entry must fit theme to be qualified for the prize
Prize must be claimed within 2 weeks
Please link your project posting not just your blog
Please comment after linking 
You have until May 30, 2012 to enter your project.
Here is the Line Up You for some great inspiration:

My Cricut Craft Room - Something New

Do you remember the old wedding saying, "Something old, something new, something borrowed, something blue."? Every Thursday this month we will be creating projects around this saying. This week we're exploring Something New and I've made a wrist corsage. I've also provided a step-by-step tutorial on how I made mine.

Cuts needed (all cuts are from the Art Philosophy cart):
Flower - 6.76" with gem added to center
Branches - 1.71"
Butterfly - 0.88"
Tag - 1"
The white paper is cardstock. The pink paper and ribbon came from my cousin's wedding invitation.

Start by stringing your ribbon though the tag, which will act as the base to build your corsage from. Cover center of tag with glossy accents.

Position branch cuts as desired. I did a dry run of this first to make sure they weren't too long or short.

Add flower. To ensure the flower would stay put I added extra glossy accents to the bottom of the flower.

Add butterfly to flower and tie to your wrist.

I hope you enjoyed my project today. To see more projects like mine please visit MyCricutCraftroom.blogspot.com

Challenges:
Fantabulous Cricut

Tuesday, May 8, 2012

My Cricut Craft Room - Rose Card


Today the MCCR DT will be sharing cards featuring roses. Remember this cute box I made for my daughter's assistant teacher?
Well the card I made for today coordinates with it.
I used Art Philosophy for my card base (7.47"x5") and mat (3.25"x4.25"). I used VersaMark ink and black embossing powder with a Close To My Heart "Thanks" stamp.
Inside, I used my computer to generate the sentiment and positioned my mat on my gypsy to cut it out the way I wanted. The edges are inked with Tim Holtz's Peeled Paint distress ink. All papers and stickers are from Echo Park's Victora Gardens line.

It's a simple gift but I LOVE the way it turned out. If you'd like to see more projects like mine head over to My Cricut Craft Room.

Monday, May 7, 2012

Mickey Party Welcome Sign

Hi everyone! I'm back again to share with you a super fun welcome sign I made from my son's Mickey party.
I found this idea on Pinterest and went from there.

The signs are mounted to a old bakers rack that I saved because "I could do something with that some day".
The stars are taped to thin wire that's wrapped around the bars of the bakers rack.

Recipe:
Cricut Cartridges
Mickey & Friends - stars 2", pointing hand 1.75", other hands 2", shoe 1.75", pants 2", ears I'm not sure it was a miss cut from making the invitations
Mickey Font - 1.55"
Sesame Street Friends - street signs 4.18"
Recollections Paper - everything I make for the party will be in either red, yellow, black or white

The party is on the 20th so I hope to share a few more projects with you between now and then. I'll also do a comprehensive post after the party.

Sunday, May 6, 2012

Mickey Invitation and Thank You

A couple weeks ago I shared my tips for planning a birthday party, you can read those tips here. I have a confession to make. I wrote that posting because my son is turning 2 this month and I needed to get myself in gear and start planning!

So I've started, finally. I decided on a theme of Mickey Mouse. This was an easy decision. Ever since our trip to Disney World my son has been over-the-moon with Mickey (even though he was terrified of the actual mouse).

Today I'm sharing the invitations and thank you notes I made for the party.


Let me take you on the creative process for my invitation. I looked on Pinterest and Google and was really only seeing one kind of hand-made card. So I turned to my Mickey and Friends handbook and a light just went off when I saw the pants cut.


As you can see the pants have a red, yellow and black layer. I ignored the yellow layer all together so to get my buttons I had to cut the red layer twice (4.18"). I used my gypsy to hide the cuts I needed and save paper.

When assembling the invitation I only applied adhesive just to the outside edge, not the top, creating a pocket. The insert measures 2.75"x4.75". I felt the invitation was missing a little something so I cut and added the Mickey ears (3.5").

I like to make my Thank You notes at the same time as my invitations so I can get them out as soon as the party is over.


My thank you cards are really simple. I used Mickey Font and my gypsy to weld the letters together.
Hand - 1.25"
Ears - 1.97" (I used my gypsy to get the proportions right)
Thank You - 3.09"
Mat - 4.75"x3.75"
Card - 5.25"x4"

I hope you enjoyed my cards. Stop back tomorrow when I'll be sharing a fun party decoration with you.


Friday, May 4, 2012

My Cricut Craft Room 100 Cartridge Blog Hop

My Cricut Craft Room 100 Cartridge Hop
WELCOME TO
MY CRICUT CRAFT ROOM'S
100 CARTRIDGE BLOG HOP!!!

You should have come here from Miranda's blog, Nanas Scrap Spot, if not we invite you to start the hop from the beginning at My Cricut Craft Room.

Happy National Scrapbooking Day! In honor for this great day I have a layout to share with you. In July it will be a year since we went to Disney and I'm still not even half way done scrapping the photos. I really honor the day by sitting down and doing nothing but Disney layouts. However, I also have a 2 year old's birthday party to plan, a consignment sale to get ready for and about 5,000 other things!

Here's my project
carts used: Pooh and Friends, Mickey Font, Bloom

This frame can be found on Pooh and Friends. I cut it a 7.15" after hiding the detail cuts on my gypsy. Then I went back and replaced the details and hid the inside and outside cuts. I replaced my blade with a brown Cricut marker and reloaded my mat.
Isn't he cute! I about jumped up a down when I say how this cut turned out. I just think he's adorable. He, Piglet and Tigger are cut at 3" from Pooh and Friends and mounted with foam squares.
My title is cut using Mickey Font (a must have cartridge in my opinion) at 1".

YOUR NEXT STOP IS

Tonya - http://ittybittyladybugs.blogspot.com/ 


Thursday, May 3, 2012

Creative Cutter Room - Mother's Day

Thank you for joining us for our new challenge! We saw such fun April Showers bring May Flowers projects! We appreciate you joining us and hope you will join us for this next challenge!
Challenge and Theme: Mother's Day!

Since my mom will be enjoying the beaches of the Bahamas on Mother's Day (jelous!) I made this desk set for my daughter's teacher, Mrs. Farmer, but you could easily make this for your mom.
This set includes 4 standard size cards with envelopes, 4 3x3 cards with envelopes, 4 tags and holder.
I found this tutorial on Pinterest for making the holder and cut out steps I did think were necessary and added a few details here and there.
The blue cardstock used is Bazzill Bling and the green is DCWV.  The woodgrain paper is Little Yellow Bicycle's Twig line (wood you be mine/bird song).  Unfortunetly I can't remember what the leaf/small print paper is. I believe it may also be from LYB.
This is the standard size card. The stamp, button and flower are all from Close To My Heart.
For the 3x3 card the stamp and sparkles are also Close To My Heart. The ribbon is American Crafts.
I cut the tag from Art Philosophy using my gypsy to modify the dimensions and hide unwanted cuts. The flower/tree top is cut at 2 1/2" and stamped with a coordinating Close To My Heart stamp set. The trunk is also cut at 2 1/2". To give my tree some shine and dimension I dipped my finger into some Liquid Glass and tapped it onto the flower. Then I stamped a birdhouse. The sentiment is embossed with clear powder and the background of the tag is stamped with a woodgrain stamp.


We have a special sponsor today! Emma from My Creative Time was so generous and is sponsoring this Mother's Day Challenge! Thank You Emma!

 
THE PRIZE
The Mom You Rock Stamp Set!!

Challenge Starts today May 3 and runs until May 16, 2012.
Follow the rules then submit your new project over at the
Only entries that fit the challenge guidelines will be entered to win the prize!
Some Rules to keep in mind while playing along:

Project submissions must be new, no back linking
CCR must be mentioned in the description with a link back to here
Entry must fit theme to be qualified for the prize
Prize must be claimed within 2 weeks
Please link your project posting not just your blog
One entry per person


Please comment after linking

You have until May 16, 2012 to enter your project.


Here is the Line Up You for some great inspiration:

Carri

Tonya

Challenges:
Paper Play Time - Anything Goes
Tuesday Throwdown - In The Garden
Krafty Girls - Dear Mother
Scrapalicious USA - Flower Power
More Than Favors - Mother's Day
Really Reasonable Ribbon - Mother's Day
Ribbon Carousel - Photo Inspiration
Made Especially For You - Color Challenge
Shopping Our Stash - Mother's Day
Cooking With Cricut - Teacher Appreciation